Managing Orders
Find custom field data in your orders and export it for fulfillment workflows.
Where to Find Custom Field Data
When customers submit forms on your product pages, the data is stored with their order. You can find it in two places:
In Shopify Admin
- Go to Shopify Admin → Orders
- Click on any order
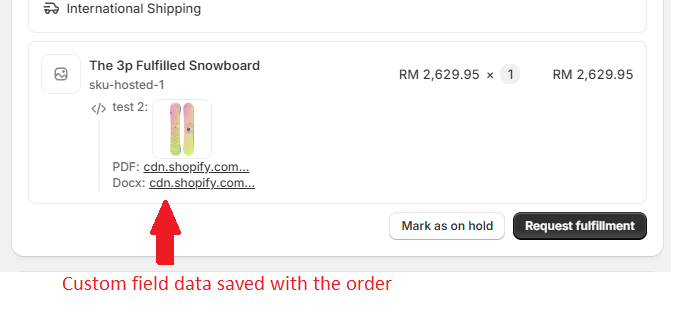
- Look for the Additional details section or Order notes
- Custom field data appears with the field labels and customer responses
In COLY App
The COLY app provides a dedicated orders view with better filtering and export options:
- Open the COLY app from your Shopify admin
- Click Orders in the navigation
- Browse all orders that contain custom field data
Viewing Orders in COLY
The COLY Orders page gives you a focused view of orders with custom data:
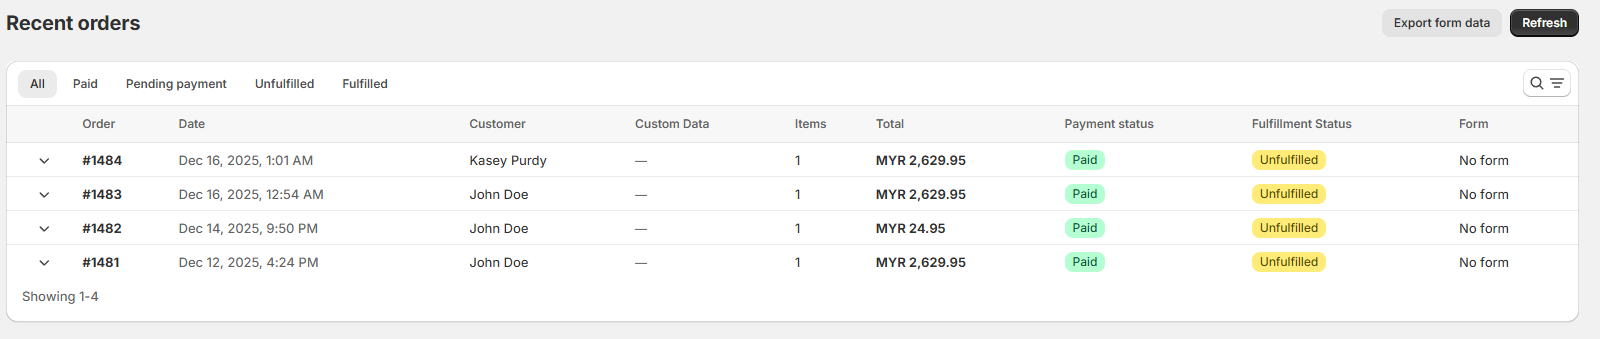
Orders List
The main view shows:
- Order number — Links to the full Shopify order
- Customer name — Who placed the order
- Date — When the order was placed
- Status — Fulfillment status (unfulfilled, fulfilled, etc.)
- Custom fields — Preview of the form data
Filtering Options
Use filters to find specific orders:
- Search — Find orders by order number or customer name
- Payment status — Filter by paid, pending, refunded, etc.
- Fulfillment status — Filter by unfulfilled, fulfilled, partially fulfilled, etc.
Order Details
Click any order to see the full custom field data:
- All form fields and responses
- Product information
- Quick link to Shopify order
Exporting to CSV or Excel
Export your order data for use in spreadsheets, fulfillment systems, or reporting tools.
How to Export
- Go to the Orders page in COLY
- Apply any filters (date range, status, etc.)
- Click the Export button
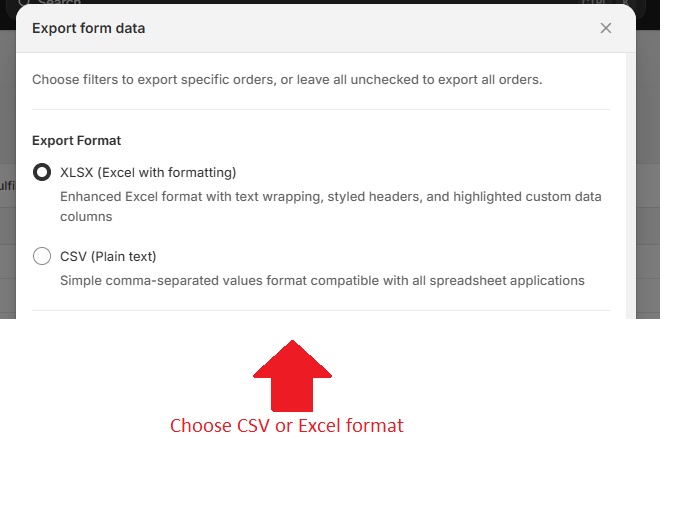
- Choose your format:
- XLSX (Excel with formatting) — Enhanced Excel format with text wrapping, styled headers, and highlighted custom data columns
- CSV (Plain text) — Simple comma-separated values format compatible with all spreadsheet applications
- Configure export options:
- Payment status — Filter by paid, pending, refunded, etc.
- Fulfillment status — Filter by fulfilled, unfulfilled, etc.
- Orders by date — Only export orders within a specific date range
- Click Export
What's Included in Exports
Each export includes:
| Column | Description |
|---|---|
| Order Number | Shopify order reference |
| Order Date | When the order was placed |
| Customer Name | Customer's full name |
| Customer Email | Customer's email address |
| Product Name | The product with custom fields |
| SKU | Product SKU |
| Quantity | Number of items ordered |
| Custom Fields... | One column per form field |
Using Export Data
Opening in Excel or Google Sheets
For CSV files:
- Open Excel or Google Sheets
- Go to File → Open (Excel) or File → Import (Google Sheets)
- Select your CSV file
- Data will appear in columns
For Excel files:
- Double-click to open directly in Excel
- Or upload to Google Sheets via File → Import
Fulfillment Workflows
Common ways to use exported data:
Print labels or work orders:
- Filter by unfulfilled orders
- Export to CSV
- Use mail merge in Word or a label printing app
Share with production team:
- Export orders with custom specifications
- Share the spreadsheet with your team
- Mark orders as fulfilled when complete
Reporting and analysis:
- Export all orders for a time period
- Create pivot tables to analyze popular options
- Track which custom fields are most used
Exports reflect your current filters. To export all orders, make sure to clear any active filters or set the date range to cover your desired period.
Tips for Large Exports
- Break into smaller batches — Export by month for large order volumes
- Use consistent naming — Include the date range in your file name
- Keep backups — Store exports in a shared drive for team access